Tuesday, December 31, 2013

Dear Me Letter Revisited and Goals for the New Year

Last year, about this time, I wrote a "Dear Me"letter positively forecasting my goals  for 2012 that I would have reached by the end of 2013.  I met some of my goals ...and others not so much. Still, I don't view the things I didn't get done as failures, just things I still need to keep on my to do list. I may not have done everything in the time frame I wanted, but I didn't fail.

This year, I'm not writing a letter to myself. Instead, I'm going to make a few  larger goals for myself  and make monthly goals as I see fit. One thing I want to be sure to do is to write down my successes and things I accomplish throughout 2013 so that at the year's end, I can actually see my progress by rereading my highlights. I saw that idea on Pinterest and think it's a good idea.

What do I want to accomplish this year? I want to continue to work on my health and the health of my family, including exercise. I also want to find a local walk to participate in. And I want to try something new...not sure what it will be yet, but I want to try something. And I want to read a non food related book...at least one...even if it takes me all year to do it.

I didn't always like New Year's, though I'm not really sure why. Now I do.  The good thing about New Year's is that its a brand new, clean slate for me to fill.  Like a new Etch a Sketch, I control the nobs and I can create whatever picture, whatever future I choose to. It's really a new beginning for all of us to make goals and strive to be better than we were this past year (at least in our own eyes), The new year holds promise and hope and it's that positivity that I love. I heard someone else say that the new year is like a 365 page blank book just waiting to be filled by us. Its a choose your own adventure book and we are in charge. That's a neat way to look at it too, I think.


I also saw this on Pinterest, and I think it's a pretty good guide ... at least for me.


However you choose to look at New Year's Eve, my wish for all of you is good health and happiness and  a few great adventures along the way.


Saturday, November 2, 2013

Halloween Cake Pops

My version of Halloween Cake Pops
Every year, my good friend has a Halloween party for her son and daughter and their friends, and every year, I make a special Halloweenie treat to send over. This year, after seeing these photos on Pinterest, I decided to make my own.


Eyeball Cake Pops

Evil Eye Cake Pops


I read a lot about making cake pops because even though I like to bake and I think, are more adept at cooking than a regular Joe or Jane, I didn't want to mess these unique little treats up...and they can be messed up. Online horror stories abound. Talk about scary stories...lol! Below are my treats and what I did to make them. I may change the method a little next time, or I may not. They were pretty good the way they were...just very sweet. Just what kids love!
First, I bought a box mix of red velvet cake and prepared it as directed. Any cake will do, but I wanted the middle of my pops to look like blood so I chose  red velvet cake mix. Some people had said that sometimes the red will show through the white candy coating, but I thought that if it did, it would only make it look spookier. I didn't find it to be a big problem either way. After the cake cooled completely, I broke it into pieces and pulsed it to crumbs in my food processor. Then I transferred the crumbs to a deep mixing bowl.
Next I used a can of frosting from the grocery store, adding a big spatula full at a time, so as not to add to much. After each spatula full, I would  mix it up with the spatula. I used 1 scant frosting can to hold mine together. The trick is getting it well mixed enough to stick together so you can roll it easily into balls without making it so sticky that it's too sticky and won't roll into anything. This is trial and error from what I have read, that is why I did it a spatula full at a time so as not to over do the icing, and this plan worked well.  I rolled the mixture into golf ball size balls and set them on a tray covered with wax paper.

While the balls rested, I melted a small amount of white chocolate candy melts in the microwave (follow pkg directions on this). Then I dipped the tines of a plastic fork halfway into the chocolate and pierced each ball. As I put the forks in, I reshaped some of the balls to make sure they stayed roundish. I put all forked balls into the fridge to set overnight.

The next day, I melted 1 1/2 bags candy melts in the microwave and transferred the balls to the freezer for a little bit. When I was ready to dip the balls, I  only took them out a few at a time. After dipping, I used a spoon to run along the bottom of the balls to get off the excess icing. I then set each ball upright on a cookie sheet covered with parchment or wax paper. I had to hold each for just a second so they wouldn't fall over. I pressed a green candy met onto each chocolate covered ball for the iris, holding each for a second so it would stick in place.  I did this until most of the balls were dipped.
Then, I melted some -green candy melts and dipped a few of the balls in that so I could make the googly eyed monster balls. Once those were covered in green chocolate, I gently placed candy googly eyes all over the balls.
  Lastly, I set these dipped balls into the fridge for about 15 minutes while the chocolate set.

Next I used a toothpick to put some melted chocolate on a googly candy eye and pressed it gently onto the green iris, holding it for  a few seconds till it set. Finally, I took some red icing and made squiggly lines on the white balls radiating around the iris so the eyeballs would look bloodshot.
These were a huge hit at the party and for my first fore into the world of cake pops, I thought I did a pretty good job. They were super cute, but time consuming...not a quick treat, but well worth the effort for a party.


Friday, October 18, 2013

Tortilla "Chips"

I love tortilla chips, but unfortunately making my own out of corn tortillas has never worked because quite frankly, I'm not wild about homemade corn tortillas. I love corn and I love tortillas, but never the twain shall meet in my kitchen, at least not ones that are homemade. Instead, I have always used whole wheat flour tortillas to make wraps,  Mexican dishes, and my beloved tortilla chips, and they were...just okay.

So the other day when I went to Trader Joe's and saw these Whole Grain Flour Tortillas with rolled oats and flax seeds, I knew I had to try them. 


I had also bought some hummus from TJ's and wanted to make chips to eat with it, so I used these speckled tortillas to do just that. I assembled  the tortillas, my Misto filled with olive oil, sea salt, and my pizza cutter. I set the oven to 350 to preheat while I prepared the "chips."  I spritzed each tortilla (both sides) with olive oil and sprinkled each with a little sea salt.  I really like using the Misto because it  sprays a fine, wide misting of olive oil that helps me to coat the tortilla without saturating it. The Misto is also non aerosol, unlike other nonstick oil sprays you find at the grocery store. Both types of sprays will work, I just prefer my Misto.  I used only a  little sea salt because while we rarely eat added salt in anything anymore, to me, chips should be salty...at least a little bit. Then I cut each tortilla into 4 large  triangular pieces and put them on a cookie sheet to bake. Until you know how long your oven will take to cook these "chips," I would watch them carefully. After about 4-5 minutes, the bottom of my tortilla pieces were getting brown so I flipped them and baked about 2 minutes longer to brown the other side.  Then I removed them from the oven and cooled them for just a few minutes before putting the next filled cookie sheet in. This is how they looked when they were finished. They were great and everyone like them. They were perfect with hummus and as a compliment to a big ole delicious chock full of veggies salad.


Finished "chips"

I saved one tortilla for DH to use to make a wrap. Let me just say: best. wrap. ever! These were inexpensive, easy to work with, and totally tasty. These tortillas are my new favorite Trader Joe's find. If you try them, I don't think you'll be disappointed.


Thursday, October 17, 2013

Red Beans and Rice.

Dh really enjoyed this dish. I have been making it for awhile now, but usually I make it vegetarian. This week I happened to have some Jennie-o turkey kielbasa so I decided to use it. Either way, it's a great dish.

It's unfortunate for me that because of the green peppers, I cannot enjoy this dish. Leave them out you say?  It wouldn't be the same. I do love to smell it though because the aroma is to die for. And, I think it's one of those dishes that is even better the next day. It does make a lot though so scale it down if  need be. I hope you enjoy it.


Red Beans and Rice

  •  1/2 of a Jennie-O turkey kielbasa, sliced and cut in halves (optional)
  • 1/2 c heaping diced onion
  • 1 stalk chopped celery
  • 1 small green pepper, diced
  • 1 1/2 tsp minced garlic
  • 1 small bay leaf
  • 4 c low sodium vegetable broth
  • 3 cans no or low sodium red beans, drained
  • 1 can diced fire roasted tomatoes
  • 1 tsp Cajun seasoning
  • 1/2 tsp Tony Chachere's
  • 1 tsp oregano
  • a generous sprinkle of thyme
  • a pinch of cayenne

    Prepare all your veggies and the kielbasa if using. Put in a pot  with minced garlic and bay leaf and water saute all till veggies are tender. Add 4 c  low sodium vegetable broth, beans, and spices.  Bring everything to a boil. Reduce heat and simmer 10 minutes or so. Add tomatoes and simmer 10-15 minutes more.
    Remove bay leaf. put some of the veggies and beans mixture in a blender with a little of the juice. I put about 1 1/2 cups in my blender. Blend till smooth, and then gently pour back into pot.Stir to incorporate all and taste so you can re-season as needed.
    Serve over a bed of rice and garnish with diced green onions. Add hot sauce to taste if need for heat. Dh likes to add extra Tony Chachere's as well.


Monday, October 7, 2013

Vegan Kickstart, Day 1


I had overnight oatmeal today for breakfast. Basically, I added  1/2 c oatmeal and 1 c almond milk, 1 tsp chia seeds, and 1 Tbsp  ground flax in a bowl. Then I put it in the fridge overnight. In the morning I simply added 1 spoonful of the apple butter I made yesterday for flavor and sweetness. Lastly, I warmed it up on the microwave because I cannot eat cold oatmeal. I'm not sure  I liked the "raw" oats. They were chalky, like oat flour.  They did fill me up quicker than cooked oats, probably because they had swelled overnight soaking up all the almond milk. The chia and flax seed meal also added more bulk sitting overnight. I have been researching the nutritional value of cooked v. raw oats, and have found nothing substantial to support one way over the other. In my mind, I would think raw would be better, much the same way that boiled vegetables lose some of their nutrients when boiled too long, while raw veggies maintain their nutritional integrity. One small spoonful of the apple butter I made yesterday was the perfect sweetener. I think I will have to try other butters and homemade jams, perhaps pumpkin and blueberry to sweeten future bowls.
 
My lunch consisted of a mixed green baby kale and spring mix salad with carrots, broccoli, cucumbers, and 3 green olives with a cup of canned tomato soup made with water and sprinkled with nutritional yeast. Some delicious red seedless grapes finished off the meal.  I used canned soup because I have yet to find a really good tomato soup recipe that I like. I'm still on the hunt though. The baby kale came from Sprouts and it is sooo good


 I had a banana snack with a little Nutella between lunch and dinner. Then I realized Nutella had  milk in it...damn it!  I L-O-V-E Nutella!  : (

Dinner was whole wheat linguine with my spaghetti sauce, a small salad, and a half a glass of wine.

Lots of water and tea today...all in all, a pretty successful start.

Sunday, October 6, 2013

Just Checking In....and Apple Butter

After reintroducing some meat back into my diet, I have ditched it once again. 

Originally, my doctor thought it might be good for me to add a little meat for the extra protein. I ditched that advice, however, because I didn't feel any better eating more meat, and I gained 7 pounds.  I don't blame that only on eating more meat, but it didn't help. I only added chicken and a little fish, and I never really enjoyed it. Still, eating a little meat did make me want more meat. It was a vicious cycle. So once again, I am meat free.

I also gave up most dairy products since my doctor said that the sugar in milk and yogurt was not good for me, and egg yolks since they were a carrier of oodles of cholesterol. I had actually been eating eggs frequently before that,  probably 4-5 times a week, which, I admit, was way too much. So I went to eating eggs once a week, mixing the whole egg with an egg white, and then, just the egg whites. Now, no eggs. I have not had yogurt or skim milk in months. My last dairy holdouts were cheese and cottage cheese (mainly for the protein), butter, half and half in my coffee, and sour cream, just because I love it (I don't eat it very often, though). Now, only half and half remains  as a regular staple for me. I still eat sour cream and butter occasionally but not very often.

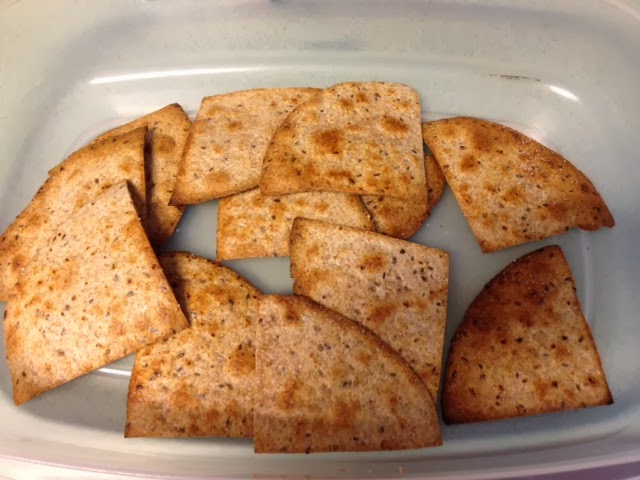
Last week, I started back to being vegetarian. I felt a ton better.This week, I'm going mostly vegan. I had 2 slices of cheese last week and for me that is amazing. I would be completely happy living my life on cheese and bread, but I'd be bigger than a house if I did. So tomorrow, I will be redoing the 21 Day Vegan Kickstart . I just feel the need to get back to basics (mostly). My biggest challenge is to find a vegan protein powder that I like. I am a little concerned since I don't like tofu, and since I don't eat soy everyday, that  I may not be getting enough protein, but I'm going to go with it for now. I am also investigating acceptable ways to eat quinoa (which I do not care for) that will not make me want to hurl.

I am also trying desperately to get off artificial sweeteners. I'm doing better, but that is still a work in progress.


Currently, I am reading  Dr Neal Barnard's 21 Day Weight Loss Kickstart.
I find it helpful to read about health, healthy eating, and making healthy choices when I am trying to change my eating patterns because I feel like it helps to keep me grounded and focused.  I also have been using this almond milk in my oatmeal. I can't go drink almond milk because it still doesn't satisfy me the way a glass of ice cold skim milk always did, but I can sometimes bake with it or use it in oatmeal with no problems. At least it's progress.

I am trying to refocus my health quest by not actually focusing on my weight, but more on just what I am eating and putting into my body. that way even if the scale doesn't move, I'll still feel successful by just eating real foods and putting  good things into my body.


Today, I made a crockpot apple butter recipe that my beautiful sister, Tricia, sent me. You can find the recipe here. Basically the ingredients are apples, cinnamon, nutmeg, clove, and brown sugar. Excellent flavor and consistency, but way too sweet for me. We will still eat it, but next time I make it, I will use even less brown sugar than I did this time. I cut the recipe in half including the brown sugar, but it's still too sweet. I think if I had used a tart apple like Granny Smith, it might be okay, but I used a mixture of Golden Delicious, Jongold, Honey Crisp, Braeburn, and Jonathon. The apples had so much natural sweetness already that a lot of extra sugar was not needed except to make the butter truly brown maybe. Since I want to try to cut out as much unnatural sugar as I can, I think I'll still used a mixture of apples, just less brown sugar. I'd rather have the natural sweetness anyway, even if the apple butter is lighter than normal apple butter. Anyway, the flavor is great, and I will definitely make it again with modifications.  Here is a picture of how it looked this time. Consistency is spot on. Tomorrow morning it will be swirled in my overnight oatmeal.


It's not my own recipe, but it get 5 spoons.

Wednesday, July 24, 2013

What I've Been Up To Lately

Life has been crazy lately, and so my blog has taken a backseat.

Due to some health issues (nothing serious), I have reintroduced  a little lean meat and fish back into my diet. I am eating more Nutritarian like I was in the very beginning, but still plant strong. I also have been collecting some new food ideas and recipes to try since I've really been in a food rut lately. I am avoiding egg yolks and not drinking milk or eating cereal with milk. In my oatmeal, I am embracing almond milk. It is still not a favorite of mine, but I'm working on it. I also am decreasing  everyday my dependency on sugar and sugar substitutes...and yes, Tab and other diet sodas. My diet is definitely a work in progress right now and it may be changing some more.

Another thing I am doing is investigating more gluten free recipes and products. We had this cornbread mix with homemade bean soup the other night and it was delicious. I have tried so many cornbread recipes and this mix is the best I've had. Everyone really liked it. I made mine into cornbread muffins rather than in a flat pan.

I am also working on expanding my football food list. This was last year's football food blog post.  August is a struggle for my family food wise, so I'm trying to stay on top of things. Look for this year's football food post in the coming weeks. 

Besides football food, I also have taken each child's likes and requests into consideration and made my school lunches food list. I do this every year as well since likes and dislike change from time to time. This list goes in the front of my recipe binder for easy reference. It  is really helpful so I can keep up the variety in the kids' lunches.

Monday, July 1, 2013

As Seen On Pinterest...

So, this week I tried to get rust off of my knives by using lemon juice. I only soaked mine for about 3 minutes and as you can see from my pictures below, it worked pretty well. Next time I'll soak a little longer, but how cool was this?  Here is the pin from The Colorless Cottage.

Before
 
After

I also tried to make #Mountain Dew glow following this instructional video that I found on Pinterest. DH was calling me "Shannon Nye" as in "Bill Nye, the science guy." Everyone gathered together for what I though was going to be really cool. So, I mixed everything, shook it up, turned out the lights and...we were all sitting there like schmucks in the dark with no Mountain Dew glow bottle. Oh well. I only spent $1.59 for the drink and I figured it was worth a shot.   The kids said, "Epic fail, mom." But I told them its like Thomas Alva Edison once said when reflecting on his failed attempts: “We now know a thousand ways not to build a light bulb” I now know one way NOT to make Mountain Dew glow. You live and you learn. If it had worked, there would have been ooohs and ahhhhs...

Saturday, June 29, 2013

Steph's Chicken Enchiladas

Tonight I made the best chicken enchilada! This is not a new recipe for us, but one I don't often make. I don't make it often because  it involves canned cream of mushroom soup and we try to stay away from prepared or packaged foods whenever possible. But, the kids asked, and I obliged.  Once in awhile will be okay. It's a great dinner especially if you're having company because it is a restaurant worthy meal and guest will love it.

I originally saw this recipe many years ago on  Allrecipes.com, however when I went bank to look for it, it could not be found. Luckily, I still had a copy saved to my hard drive. I need to learn how to make my own condensed cream of mushroom soup...maybe next time...

 
Steph's Chicken Enchiladas

Servings:
6

1 tablespoon butter
1/2 cup chopped green onion
1/2 teaspoon garlic powder
1 (4 ounce) can diced green chilies
1 (10 3/4 ounce) can condensed cream of mushroom soup
1/2 cup sour cream
1 1/2 cups cubed cooked chicken breasts (I used 2 c shredded-I prefer the chicken shredded)1 cup shredded cheddar cheese, divided (I use more cheese than called for-see notes below)6 (12 inch) flour tortillas (can use whole wheat if you like)1/4 cup milk

Directions:

Preheat oven to 350 degrees F (175 degrees C). Lightly grease a large baking dish.

In a medium saucepan over medium heat, melt the butter and saute the green onion until tender (about 3 to 4 minutes). Add the garlic powder, then stir in the green chilies, cream of mushroom soup and sour cream. Mix well. Reserve 3/4 of this sauce and set aside. (I always double my sauce ingredients because I like to serve it with extra sauce. It also makes a great dip for tortilla chips.)
sauce mixed together
chicken, cheese, and sauce mixture
To the remaining 1/4 of the sauce in the saucepan, add the chicken and 1/2 cup of shredded cheddar cheese. Stir together.


Fill each flour tortilla with the chicken mixture and roll up. Place seam side down in the prepared baking dish. (note:  I use my small cookie scooper to put the filling down the middle of each tortilla. It works great. Also, after I put my filling in, I sprinkle some more cheese on top and then roll up.)
In a small bowl combine the reserved 3/4 of the sauce with the milk. Spoon this mixture over the rolled tortillas and top with the remaining 1/2 cup of shredded cheddar cheese. Bake in preheated oven for 30 to 35 minutes, or until cheese  melts. (notes: I put some sauce in the bottom of the pan, then place my filled tortillas on top before spreading sauce on top of them. And I used more than 1/2 c cheese.)


Let sit 5 minutes before serving.


Tuesday, June 25, 2013

Vegetarian Stuffed Peppers

I am allergic to Peppers, but DH loves them...so this one's for him. They smelled great! I made them with 1 green pepper cut in half since I was only making them for 1 person.

Vegetarian Stuffed Peppers

1 green pepper, cut in half from top to bottom and de-seeded
a little less than 1/3 c cooked Trader Joe's 10 minute faro
2 Tbsp chopped onion
1/2 c or less vegetarian crumbles
leftover homemade spaghetti sauce or jarred sauce of your choice
2 Tbsp Italian Panko bread crumbs (I use Ian's brand)
2 Tbsp grated Parmesan cheese
4 Tbsp shredded mozzarella or Italian cheese blend

First cook 10 minute faro according to package directions.

Next, cut a green pepper in half from top to bottom. Remove seeds and membranes from pepper and rinse well. Boil a pot of water. Once water is boiling drop pepper halves in and boil @ 10 minutes till done. Remove from the pan and drain.You can also steam peppers if you wish.

While farro and water are on the stove, chop up 2 Tbsp onion. Place onion and veggie crumbles in a small pan along with a little water. Water saute over md- md/high heat till onion is tender. Reduce heat to low/md for a few minutes.  Add cooked farro and enough spaghetti sauce to combine and pull it all together.

Put a little water and spaghetti sauce in the bottom of a baking dish, put peppers on top and fill each pepper with the farro crumble mixture. Next mix Panko, Parmesan, and mozzarella cheeses. Top each green pepper half and bake till cheese is melty. You can put it under the broiler for a bit too to get a nice crunchy brown topping. To serve I put some extra sauce on the plate and the finished green pepper on top.  Enjoy!


Friday, June 14, 2013

As Seen On Pinterest....Cleaning Dirty Pans and a Stromboli Recipe

My mother has a very cool board on her Pinterest site called " I saw it, I pinned it, I did it." I think it's a great idea (Thanks, Mom!), so I'm starting my own board on my Pinterest account complete with reviews, and this is my first one.


My before and after picture...virtually no difference
When I saw this idea on Facebook last week (via Pinterest), I thought I'd hit the kitchen tips and tricks jackpot;  a cheap, effective way to clean my old well used, well seasoned cookie sheets. Ahh....if only it had worked!  It was cheap and easy , but it didn't clean hardly any of my cookie sheet grime. I even set the paste on the cookie sheet and let it sit for 1 hour thinking that soaking it would help...not so much. I was disappointed.

My second Pinterest try this week was this pin on Pinterest from Lauren's Latest: a Stromboli.  On the left is the picture from Lauren's Latest via Pinterest...my picture of my Stromboli is on the right.
Picture from Pinterest
My picture.


I thought the kids would all love it because it was like pizza with a twist. I even used Boar's Head thin slice pepperoni in it. 2 out of 3 kids liked it. My oldest said, "If you really feel like you need to make it or you'll just die, I 'll eat it, but it wouldn't be my first choice." Please son, be a little more honest, will you?  It was his Mighty fine dinner, Miss Betty moment. I will make it again because the bread, which is Lauren's Fail Proof Pizza Dough recipe is terrific. It is so easy to make and so easy to work with. I used a mixture of whole wheat  and white flour and olive oil. I think the problem with the recipe was that even though you rolled the dough tightly, the dough in the middle just melted into the toppings which helped make the insides super gooey and hard to eat. There also was too much cheese involved. I love cheese but I agree with my oldest son that it seemed like he was eating a brick of melted cheese...hard to eat and hard to swallow.  So, I will make the crust again, but I will make it into calzones or smaller pizza pockets rather than the single big Stromboli.
So the  dough gets 4 spoons


The Stromboli itself , only  2 and a half spoons.

Wonder what I'll try next?


Friday, June 7, 2013

National Donut Day and Ballerina Brownies

Today is National Donut Day, so I decided to make my kiddos some donuts.  That was my plan anyway till I came across this recipe for Ballerina Brownies that my sister sent me some time ago. I don't know where  the original recipe came from.  Being a rebel, it was Ballerina Brownies for the win!  I asked my beautiful sister why they were called Ballerina Brownies and she had no clue. I think it's because whenever you eat them, they're so good you just want to get up and dance. That's my story anyway, and I'm sticking to it.


My "brownienut."
 I stuck the 2 halves together
and sprinkled with powdered sugar.
The Perfect Brownie
Pan by Pampered Chef
So I made the brownies using my new perfect brownie pan from Pampered Chef (Thank you, Leanne Blecha Gleitz). The great thing about this pan is that each brownie comes out with 4 edges (great if you like that sort of thing). I also think the pan itself will be very useful for cornbread which I adore and mini individual cakes. The possibilities are endless.
 
After I made the brownie mix, I still had some leftover so I decided to use my Wilton donut pan and make a couple of "brownienuts."  It was a good idea, I thought, but with the nature of the brownie being to break apart and be fudgy-crumbly, the four that I made broke apart when I got them out of the pan. My boys ate them anyway because they were delicious, but my "brownienuts" concept needs a little more work.
 
All that said, these are great brownies!
 
Delicious Brownies (or Ballerina Brownies)
(from Melissa Framiglio—neighbor on Everett)

1 cup melted butter
¾ cup cocoa powder
2 cups sugar
4 eggs
2 tsp. vanilla
¼ tsp. salt
1 cup flour
1 cup chocolate chips (or other chopped candy) (NOTE: I use mini chocolate chips)

Preheat oven to 350.
Mix everything together (I mix dry, then add wet, but it's all done in one bowl.) & put in a 13x9 pan coated with cooking spray.
Bake 30-35 min. until it pulls from edges and toothpick comes out with fudgy crumbs.
 
These  brownies get a solid 4 spoons. My boys thought they were delicious. I like them because I put every ingredient in myself so I know there's no added crap like what might be in a regular boxed  brownie mix.


Monday, May 27, 2013

Pumpkin Muffins With Cinnamon Glaze


So, my sister sent me an email not long ago with a recipe for a vegan pumpkin muffin with cinnamon glaze along with a review from one of her friends.
"Oh, those are great!"  My oldest child declared when he ate them. As we were eating them,  we agreed that while the cinnamon glaze rocks, that the next time I make these muffins ( and I will make them again) that I will use my caramel icing as a frosting, making them more of a cup cake. You can get the caramel icing recipe here.  My other kids liked them too, and my mother in law who was visiting us said she thinks they even tasted wonderful plain. A dusting of  powdered sugar would also be a good topping, I think.

The great thing about these muffins is that they were easy to make and were not very time consuming. The batter is thick but easy to work with.  I did make a few changes though to the original recipe. First, I used only 3/4 c sugar because I thought that with the powdered sugar in the glaze as well, that it might be too sweet. I'm glad that I cut down on the sugar because the amount I put in was perfect. Second, I used only whole wheat pastry flour since I never use white flour. Third, I used organic skim milk, not soy milk, so technically, my version was not vegan.

Batter
Vegan Pumpkin Muffins With Cinnamon Glaze
(Adapted from "Vegan Cupcakes Take Over The World," by Isa Chandra Moskowitz and Terry Hope Romero)
1 cup canned pumpkin
3 tablespoons canola oil
3 tablespoons applesauce
1 cup granulated sugar
1/4 cup soy milk
1 teaspoon vanilla extract

 ....The original recipe was posted on Ann Arbor.com. You can find the complete recipe there or on my muffins, donuts, breads Pinterest board. Check either place for the complete original recipe.


Tuesday, May 21, 2013

Alphabet Soup: Z is for Zucchini-Cheese Casserole

I have been trying to make cooked veggies or a veggie casserole every now and then, because as much as I love salads, these casseroles and veggie combos give me a healthy alternative for the times when I'm just not in a salad kind of mood. This week, I made zucchini-cheese casserole, one of my favorites, that I haven't had in some time. It also fits beautifully into the South Beach Diet for those who follow it.  This is not my recipe. I think this originally came from an old cookbook my Grandma, Mawmaw, had from the American Heart Association., but I'm not 100% sure of that. What I am sure of is that this is a satisfying, delicious veggie dish, and if you can use farm fresh zucchini, onion, and tomatoes, it will be even more flavorful.
Zucchini-Cheese Casserole, a great way to use farm fresh produce available
in abundance in the summertime. Photo from the kitchen of Shannon Recktenwald


Zucchini-Cheese Casserole

3 md.zucchini squash

1/2 c. chopped onion

fresh tomatoes-the amt you need will be different based on what kind of tomatoes you use and how big they are ( i.e you need to use less regular tomatoes and more romas b/c romas are smaller I like to use organic romas)

2 Tbsp. olive oil

1#  LF cottage cheese

1 tsp. basil

1/2 tsp. oregano

1/3 c. LF parmesan cheese


Slice zucchini thin.  Sautee zucchini and onion in olive oil till zucchini is softened and onion is opaque.  While you are doing this, whip cottage cheese and seasonings in a blender or food processor.  Spray a casserole dish with Pam and layer zucchini-onion mixture, then cottage cheese mixture, then thinly sliced tomatoes. Repeat 1 more time ending with the tomatoes. Top with parmesan cheese and bake at 350 for 25-30 minutes. It will be bubbly and top should be browned.

Makes 6 side servings or 3 main dish servings

Cook's notes:   LF means low fat.  If you use FF (fat free) cottage cheese instead of LF, use a slotted spoon to remove servings as it creates a lot of water/ juice along with the veggies at the bottom of the casserole.   Regular cottage cheese, which my mom uses didn't create that liquid at the bottom. Another way to keep the liquid sown is to drain the zucchini-onion mixture before layering it.

Also, I like cheese so I usually sprinkle some LF mozzarella cheese on top of my casserole as well.

As is, it is a delicious recipe that tastes very Lasagna-esque.  I eat this lot for lunch b/c it keeps for several days in the fridge and is a great way for me to get my veggies in.